Monday 6 December 2021

Install .NET core SDK on Amazon Linux 2

 MY OPERATING SYSTEM DETAILS:
$cat /etc/os-release

NAME="Amazon Linux"

VERSION="2"
ID="amzn"
ID_LIKE="centos rhel fedora"
VERSION_ID="2"
PRETTY_NAME="Amazon Linux 2"
ANSI_COLOR="0;33"
CPE_NAME="cpe:2.3:o:amazon:amazon_linux:2"
HOME_URL="https://amazonlinux.com/"


Installing 3.1 version of dotnet sdk:

Step 1: 
$
wget https://download.visualstudio.microsoft.com/download/pr/6425056e-bfd5-48be-8b00-223c03a4d0f3/08a801489b7f18e9e73a1378082fbe66/dotnet-sdk-3.1.415-linux-x64.tar.gz

Step 2:

$mkdir -p "$HOME/dotnet" && tar zxf dotnet-sdk-3.1.415-linux-x64.tar.gz -C "$HOME/dotnet"

Step 3:

$ export DOTNET_ROOT=$HOME/dotnet && export PATH=$PATH:$HOME/dotnet

Step 4:

Verify the version as 
$dotnet --version

Tuesday 28 July 2020

Vault Deployment on Openshift


Import Vault Official Image from DockerHub.

$ oc import-image vault:latest --confirm -n <Namespace>

Verify the Image stream presence in the Desired namespace.

$ oc get is

Deploy the image stream using below command:

$ oc new-app vault:latest

Create new service account with the name "vault"

$ oc create sa vault

Assign anyuid access to the service account created 
Note: You need to have cluster admin rights to run this command.

$ oc adm policy add-scc-to-user anyuid -z vault

Edit the deployment yaml file using the below command and add the service account details in the specifications.

$ oc edit dc/vault -o yaml

Once the editor opens add the below two lines
      serviceAccount: vault
      serviceAccountName: vault

Add the below two environmental variables to the deployment yaml file to run the image as vault user.
$ oc set env dc/vault SKIP_CHOWN=true SKIP_SETCAP=true

Deploy the changes using below command:

$ oc rollout latest vault

That's all! Pod should be up and running , service and route can be created to access the Vault application externally.


Saturday 6 June 2020

Connection to Backend service from Frontend Route in Openshift using proxypass method

Connection to Back end service from Front end Route in Openshift using proxypass rule:


We all know service object is used to connect the front end application to the back end application . Similarly route object when accessing outside the cluster.

Here i am going to show about how we can connect to back end application (not exposed as route) from front end application outside the cluster.


As we need to understand in reality back end application should not be exposed outside the cluster as route. This can be done using front end Apache configuration (pod running in the same cluster where back end pod is running).

 The FE Apache server other than returning the angular sources , it should also be configure to reverse proxy. So every call to the back end will passthrough the route of the front end.

Ex: Let us assume the Front end application is available as route and running in the path
       https://hpvbalaji.blogspot.com/
      So here every call to https://hpvbalaji.blogspot.com/api  should be a reverse proxy request to the back end .
  Here Apache will be configured to call the service of the back end every time it get's a call to the https://hpvbalaji.blogspot.com/api. By doing this no need to expose the back end service as route.

......I know it's quite difficult to understand with the above example , let me show the Apache configuration now so that u guys can understand better.....

1. Navigate to /etc/httpd/conf.d Directory or  /etc/httpd/httpd.conf file
2. Add the below two lines in the httpd configuration file.

               <VirtualHost *:80>

           ServerName sub.domain.com
           ServerAdmin me@domain.com
           <Proxy *>
            Order deny,allow
            Allow from all
       
           </Proxy>
 
           ProxyPass /api/ http://backend:8080/
   ProxyRequests Off
           ProxyPreserveHost On
       </VirtualHost>

    Note: back end is the service name of the back end pod.

3. Here in case of openshift we can create volume with the below command using configmap and mount this new modified Apache configuration file on the container file system as below.

          oc set volume dc/frontend --add --name=httpdconf --type=configmap --configmap-                              name=kerberos-auth --mount-path=/etc/httpd/conf.d/


More infomation on Proxy pass can be found here: https://httpd.apache.org/docs/2.4/mod/mod_proxy.html#proxypassreverse

Saturday 30 May 2020

Chaos Engineering on Openshift

Chaos Engineering on Openshift๐ŸŒ
    Reliability and high availability are key features of Openshift, but even the most resilient systems can fail..... Applications crash, hardware breaks, and nodes can go offline. These failures can have damaging and unpredictable consequences for organizations, especially those that are unprepared. Don't worry folks!! we have Chaos engineering for that. So here is my blog which shows the installation part of one of the popular tool in chaos i.e., Gremlin .

Gremlin Installation:

Pre-requisite:

1. Create your gremlin account using below link :

  • To install Gremlin Openshift clients, you will need your Gremlin Team ID and Secret Key. Visit the Teams page in Gremlin, and then click on your team’s name in the list.
  • Make a note of your Team ID.If you don’t know your Secret Key, you will need to reset it. Click the Reset button. You’ll get a popup reminding you that any running clients using the current Secret Key will need to be configured with the new key. Hit Continue. Next you’ll see a popup screen that will show you the new Secret Key. Make a note of it.
  • Gremlin allows targeting objects within your Openshift clusters. After selecting a cluster, you can filter the visible set of objects by selecting a namespace. Select any of your Deployments, ReplicaSets, StatefulSets, DaemonSets, or Pods. When one object is selected, all child objects will also be targeted. 
Installation:
  • Download the Gremlin configuration manifest by running the following:
            wget https://k8s.gremlin.com/resources/gremlin-conf.yaml
  • Open the file and update the following:

       Replace the following line with your team ID: "YOUR TEAM ID GOES HERE"
      Replace the following line with your team secret: "YOUR TEAM SECRET GOES HERE"
      Replace the following line with a string that you will use to identify your  cluster:                               "YOUR UNIQUE CLUSTER NAME GOES HERE"

  • Apply the manifest with this command:
            oc apply -f /path/to/gremlin-conf.yaml

  • Download and apply the gremlin client manifest on your Openshift cluster by running the following:
            wget https://k8s.gremlin.com/resources/gremlin-client-secret.yaml
            oc apply -f https://k8s.gremlin.com/resources/gremlin-client-secret.yaml
  • Download and apply Openshift clients manifest to find the resources at the cluster scope:
            wget https://k8s.gremlin.com/resources/gremlin-chao-secret.yaml
  • After running above scripts in your OpenShift cluster and when you go back to the gremlin dashboard where you can see the Openshift nodes and all of its resources from where the attacks can be done.

Done...๐Ÿ˜ŠHere we go with Gremlin Chaos experiments on our Openshift clusters.

Keep following my blog . As i am going to come with the 5 best Chaos experiments on Openshift cluster in my upcoming blog.

Tuesday 6 June 2017

DEVSTACK

 Installion of Openstack on Ubuntu 16.04 server using Devstack  package.

DevStack is a series of extensible scripts used to quickly bring up a complete OpenStack environment based on the latest versions of everything from git master. It is used interactively as a development environment and as the basis for much of the OpenStack project’s functional testing.

Warning: 
 
DevStack will make substantial changes to your system during installation. Only run DevStack on servers or virtual machines that are dedicated to this purpose.

Prerequisites:

- Minimum 4GB of RAM with 50GB+ Disk space
- 2 CPU processors and enable NAT and virtualization feature
- Python 3.5 or 3.4 required 

Installation steps:

Step 1:  Devstack attempts to support Ubuntu 16.04/17.04, Fedora 24/25, CentOS/RHEL 7, as well as Debian and OpenSUSE. So install any of the above server on your vm.

Step2: Devstack should be run as a non-root user with sudo enabled. You can quickly create a separate stack user to run DevStack.

      sudo useradd -s /bin/bash -d /opt/stack -m stack

Step3: Configure Proxy if required in the path /etc/apt/apt.conf.d/01proxy

              Acquire::http::Proxy "_____"
   

Step4: User should have sudo priveleges

          $ echo "stack ALL=(ALL) NOPASSWD: ALL" | sudo tee /etc/sudoers.d/stack

Step5: Perform following updates using command

            $sudo apt-get update
            $ sudo apt-get git
            $ sudo apt-get -y upgrade

Step6: Switch user to stack

           $ sudo su - stack

Step7: Configure git to clone the package from git url if added proxy


         $ git config --global http.proxy "----Proxy----------------" 


Step8: Download Devstack from following git url and change directory to devstack

              git clone https://git.openstack.org/openstack-dev/devstack
           $ cd devstack


Step9: Create a local.conf file with 4 passwords preset at the root of the devstack git repo 

             [[local|localrc]]
                 ADMIN_PASSWORD=secret
                 DATABASE_PASSWORD=$ADMIN_PASSWORD
                 RABBIT_PASSWORD=$ADMIN_PASSWORD
                 SERVICE_PASSWORD=$ADMIN_PASSWORD
       GIT_BASE=${GIT_BASE:-https://git.openstack.org}
      

Step10: This is the minimum required configuration need to start devstack. Now start Devstack by running stack.sh script 

             $ ./stack.sh


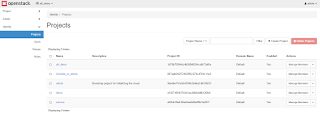
 Script starts running and it takes 20-30 minutes depends on  the internet connection. At last end with the following things to view Openstack dashboard, Please find the picture  below .


Thanks....!!!!!!!!!Enjoy exploring openstack

Thursday 18 May 2017

How to install Ansible in RHEL 6.8

Ansible Installation:
-          
  •     Epel-release repositry has to be downloaded and installed
  •         Using rpm package or yum
  •        Check wether epel has been in the list of repolist
  •       We are going to install ansible package on control node 


      Control node requirements:
  •            It should be RHEL 6 and above
  •          Linux or any other BSD based Unix system
  •           Control node must have Python 2.6 or 2.7 installed.
  •           Windows not supported


      Managed host requirements:

  •           Ssh connection should be established
  •           Must have python 2.4 and later installed.
  •          Python-simple.json package must also be installed on RHEL 5.0 managed host.


Ansible will be ready to use . You can check ansible installation by the following command:
            "ansible --version"
      
      Now you take some managed hosts(windows or linux machines) and start playing on that machine by running different ansible playbooks for configuration management. 
                                                                            ๐ŸŒ


Tuesday 21 March 2017

Virtual box guest versions setup

Virtual box showing only 32-bit guest versions???... post is here for U

  • Go to Virtual box and checkout if you are getting only 32-bit guest versions instead of 64-bit
  • If so then follow the below instructions to make it work
  • Reboot your system and press esc { f2 } keys at the time of rebooting
  • You will be redirecting to the page is shown below

  • Click on Device Configurations
  • You will be taken to this page


  • Select the check box for Virtualisation Technology and save the changes.
  • Now you restart system and check the guest versions.