Tuesday 6 June 2017

DEVSTACK

 Installion of Openstack on Ubuntu 16.04 server using Devstack  package.

DevStack is a series of extensible scripts used to quickly bring up a complete OpenStack environment based on the latest versions of everything from git master. It is used interactively as a development environment and as the basis for much of the OpenStack project’s functional testing.

Warning: 
 
DevStack will make substantial changes to your system during installation. Only run DevStack on servers or virtual machines that are dedicated to this purpose.

Prerequisites:

- Minimum 4GB of RAM with 50GB+ Disk space
- 2 CPU processors and enable NAT and virtualization feature
- Python 3.5 or 3.4 required 

Installation steps:

Step 1:  Devstack attempts to support Ubuntu 16.04/17.04, Fedora 24/25, CentOS/RHEL 7, as well as Debian and OpenSUSE. So install any of the above server on your vm.

Step2: Devstack should be run as a non-root user with sudo enabled. You can quickly create a separate stack user to run DevStack.

      sudo useradd -s /bin/bash -d /opt/stack -m stack

Step3: Configure Proxy if required in the path /etc/apt/apt.conf.d/01proxy

              Acquire::http::Proxy "_____"
   

Step4: User should have sudo priveleges

          $ echo "stack ALL=(ALL) NOPASSWD: ALL" | sudo tee /etc/sudoers.d/stack

Step5: Perform following updates using command

            $sudo apt-get update
            $ sudo apt-get git
            $ sudo apt-get -y upgrade

Step6: Switch user to stack

           $ sudo su - stack

Step7: Configure git to clone the package from git url if added proxy


         $ git config --global http.proxy "----Proxy----------------" 


Step8: Download Devstack from following git url and change directory to devstack

              git clone https://git.openstack.org/openstack-dev/devstack
           $ cd devstack


Step9: Create a local.conf file with 4 passwords preset at the root of the devstack git repo 

             [[local|localrc]]
                 ADMIN_PASSWORD=secret
                 DATABASE_PASSWORD=$ADMIN_PASSWORD
                 RABBIT_PASSWORD=$ADMIN_PASSWORD
                 SERVICE_PASSWORD=$ADMIN_PASSWORD
       GIT_BASE=${GIT_BASE:-https://git.openstack.org}
      

Step10: This is the minimum required configuration need to start devstack. Now start Devstack by running stack.sh script 

             $ ./stack.sh


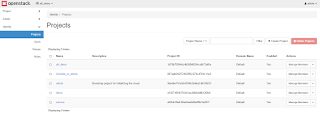
 Script starts running and it takes 20-30 minutes depends on  the internet connection. At last end with the following things to view Openstack dashboard, Please find the picture  below .


Thanks....!!!!!!!!!Enjoy exploring openstack

Thursday 18 May 2017

How to install Ansible in RHEL 6.8

Ansible Installation:
-          
  •     Epel-release repositry has to be downloaded and installed
  •         Using rpm package or yum
  •        Check wether epel has been in the list of repolist
  •       We are going to install ansible package on control node 


      Control node requirements:
  •            It should be RHEL 6 and above
  •          Linux or any other BSD based Unix system
  •           Control node must have Python 2.6 or 2.7 installed.
  •           Windows not supported


      Managed host requirements:

  •           Ssh connection should be established
  •           Must have python 2.4 and later installed.
  •          Python-simple.json package must also be installed on RHEL 5.0 managed host.


Ansible will be ready to use . You can check ansible installation by the following command:
            "ansible --version"
      
      Now you take some managed hosts(windows or linux machines) and start playing on that machine by running different ansible playbooks for configuration management. 
                                                                            🌝


Tuesday 21 March 2017

Virtual box guest versions setup

Virtual box showing only 32-bit guest versions???... post is here for U

  • Go to Virtual box and checkout if you are getting only 32-bit guest versions instead of 64-bit
  • If so then follow the below instructions to make it work
  • Reboot your system and press esc { f2 } keys at the time of rebooting
  • You will be redirecting to the page is shown below

  • Click on Device Configurations
  • You will be taken to this page


  • Select the check box for Virtualisation Technology and save the changes.
  • Now you restart system and check the guest versions.


Tuesday 7 February 2017

Codar Installation

Following shows the installation of Codar on local machine with 90 days free trial:

CODAR:
A continuous deployment solution that provides automation and release management of complex multi-tier applications across the application lifecycle


Download link : http://www8.hp.com/us/en/software-solutions/codar-continuous-deployment/

Installation steps:
  • By default Codar has no Database connected. Before installing HP Codar go for the postgresDB installation as followed.
  1.       Install Postgres DB:


    2.   After the successful installation open the pgAdminIII and connect to Postgres server.
    3.   Create a sample database of name “codardb” with owner assigned for codardbuser.
    4.   Run the setup.bat file to start with installation of Codar


5. Configure the port no. to run Codar


6. Database Configuration


7.    Set a single password for all accounts.


8.    Configure the database with proper credentials


9.   Install Embedded  HP OO server with username, PWD and port no.


  10.  Idm database configuration


11.  HP OO configuration.


12. Review the configuration once before starting the installation.


13.   After the review installation begins.(Expected time for installation=1 hour)

        ( Codar application will be running on port no: 8444 
             https://localhost:8444/csa )

Wednesday 18 January 2017

Tuesday 17 January 2017

Install Openshift locally

Installation of Openshift:--

1. Create Centos VM in Virtual box or VMware. 
2. Install Docker { command:- yum install docker wget git -y}


3.  Configure the Docker daemon with an insecure registry parameter    of 172.30.0.0/16
     In RHEL and Fedora, edit the /etc/sysconfig/docker file and add or uncomment the 
     following line.


  INSECURE_REGISTRY='--insecure-registry 172.30.0.0/16'
4.Restart Docker Daemon {command: $ sudo systemctl restart docker}
5. Download Openshift from https://github.com/openshift/origin/releases .
7. untar the tar file and copy oc file inside that to /usr/local/bin and do {command: oc cluster up}.
8. That's it!!!!
9. Now you login in to Openshift console with IP and credentials created by default.